Friday, October 27, 2017

Homemade Pumpkin Puree

Homemade Pumpkin Puree

It's that time of the year!


I know that you can buy canned pumpkin pack in the store, but have you ever wondered what a pumpkin pie would have tasted like in the days of Laura Ingalls Wilder? Well, I sure have. And since pumpkin pie is my favorite pie ever I had to try it from scratch. Let me tell you, real pumpkin puree it is like a bite of creamy heaven.

There was one year I had a neighbor with a large garden who had grown pumpkins. A lot of pumpkins! Thankfully, she was willing to share them with the whole neighborhood.

I ended up with about eight pumpkins in my garage and no idea what to do with them. But you know me, I had to do something with all these pumpkins. Waist is not an option with me. After a few jack-o-lanterns I found out how to make pumpkin puree. It has been one of the best, the yummiest, things I have ever done.

Before I tell you how to make your own pumpkin puree there is a warning... Once you use pure pumpkin puree in a pie or other recipe you will never, EVER, want to go back to the stuff from the can. It is that good!


1st. Start with a pumpkin. Most stores sell the little pie pumpkins next to the big jack-o-lantern ones. While the little pumpkins are grown to be made into puree I have used both kinds and have ended up with great puree from both kinds. The smaller ones will usually give you a darker colored puree, if you were wondering;)


2nd. Let's gut that bad boy! Cut your pumpkin in half so you can easily get to all the gooey stuff in the middle. Discard the stringy stuff but keep the seeds for roasting. You don't have to get too picky about how 'clean' the inside of your pumpkin is.


3rd. Once your pumpkin is cleaned out, slice it into smaller sections and arrange on a baking sheet. Face up is best.


4th. Put them into the oven at 350 degrees for 45 minutes, or until they are tender. Poke them with a fork to see if they are done. The pointy edges should be just about to get crispy.

5th. Let the pumpkin slices cool enough that you can handle them. Then turn them over so you can pull the skins off. Yes, the skins should pull right off. If not, then pop them back in the oven for 5 more minutes. (There was a lot happening in the kitchen right about here so I stopped taking pictures. Sorry)

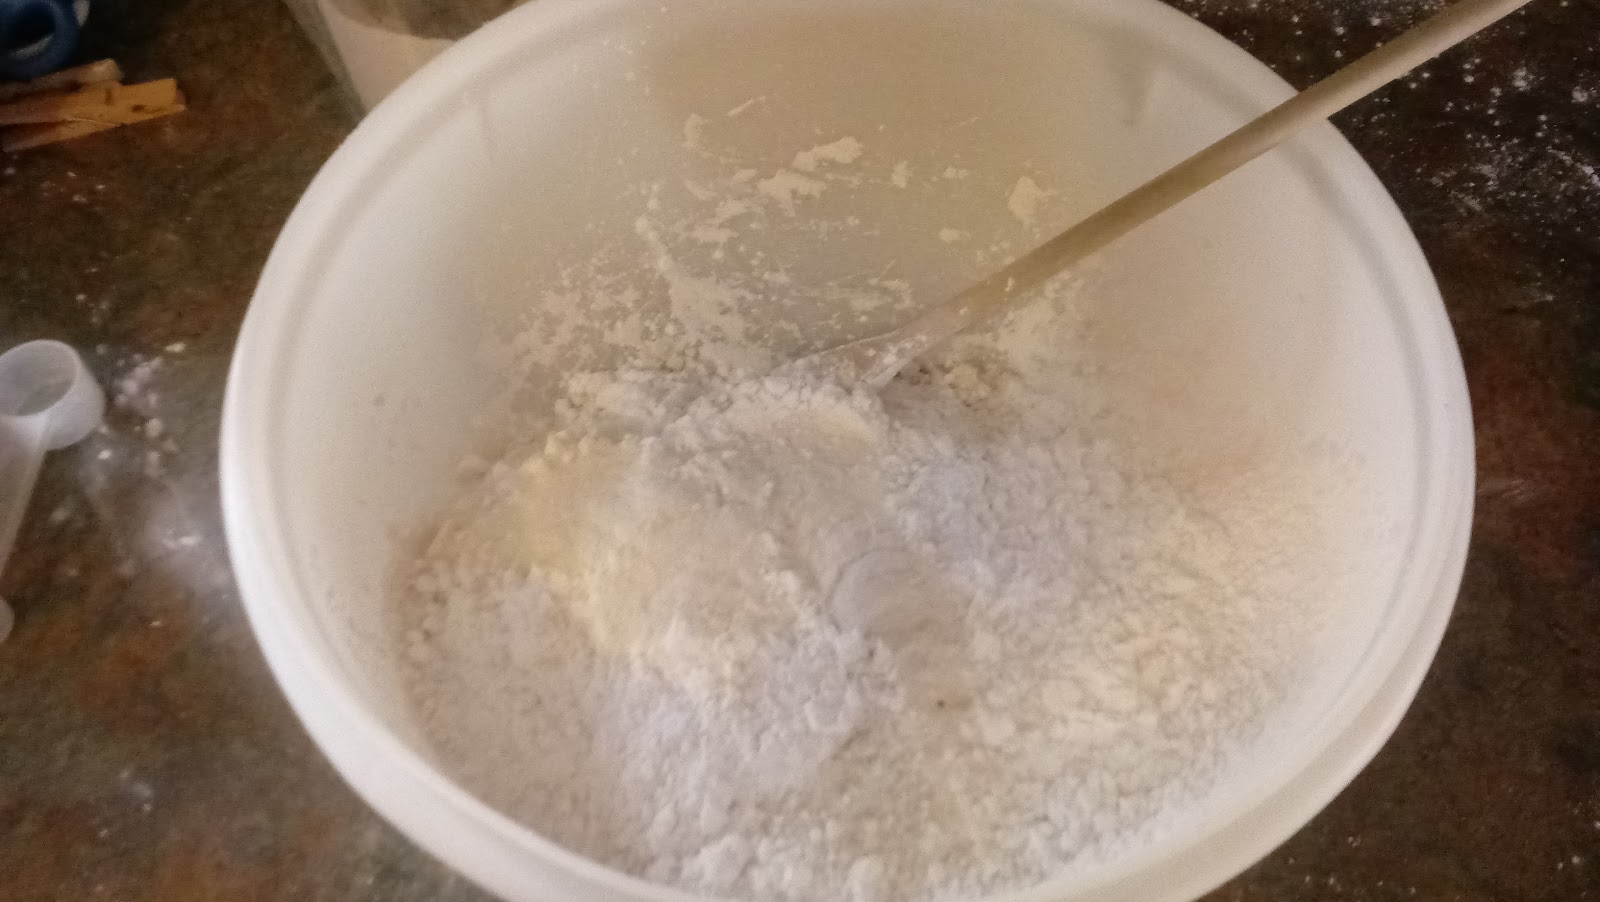
6th. With the skins removed it is time to puree! I use a blender but there are lots of ways to turn a pumpkin to mush. If you decide to use a blender like I do, place several chunks into the blender and push puree. You will need to add some water to get things moving. Add water a single Tablespoon at a time, just until things get moving. You want puree, not soup! (Before you ask, yes I did make that mistake one year.)

And that is it! Once you are done blending you have some awesome, homemade puree that you can use right away.

If you have more than you need, store in in freezer storage bags for future use. I put 2 cups of puree in each  bag and throw them in the freezer! OK, not throw. I carefully make sure each bag can lay perfectly flat so they take up less room. What can I say, I am a neat freak;)

You can store it in a freezer for 6 to 8 months this way... OK, more like over a year. I made a huge batch of pumpkin puree once and only just finished it 3 years later! Wow, so glad I was honest with you all.

Coming soon... Homemade Pumpkin Pie!

Wednesday, October 11, 2017

Gluten Free Blueberry Muffins

Gluten Free Blueberry Muffins


It's always a  struggle to get really good gluten free baked goods. But fear not! I have an amazing gluten free blueberry muffin recipe for you.

Here is what you need:

2 Cups Flour (Check out my Gluten Free flour mix!)
1 Cup White Sugar
1/2 teaspoon Baking Powder
1/2 teaspoon Baking Soda
1/2 teaspoon Salt
1 1/2 Cups fresh or frozen Blueberries (if using frozen berries do NOT thaw)
2 Eggs, lightly beaten
1 Cup Sour Cream
1/2 Cup Vegetable Oil
1/2 teaspoon Vanilla Extract

AND a Mini muffin pan. I have tried these muffins in a regular sized pan and they just don't come out as well so we always go for mini muffins. Plus, my kids love the smaller size!

Preheat your oven to 400 degrees Fahrenheit. In a large bowl combine the flour, sugar, baking powder, baking soda, and salt. Add the blueberries and gently toss. (This will keep them from sinking as the muffins bake.) In a separate bowl, combine the eggs, sour cream, oil, and vanilla. Mix well. Stir the wet mixture into the dry ingredients until moistened. Don't over mix. Grease your mini muffin cups. Fill them to 2/3rd's full. (I use my cookie scoop to get them all the same size.) Bake for 15 to 18 minutes, or until a toothpick comes out clean. Allow to cool for 5 minutes before removing from the pan.

Well, there you have it. Straight to the point Gluten Free Blueberry Muffins. You can use other berries if you want but these are my daughters favorite. They also keep in the freezer for 2 months. Just bake, freeze, then warm them up so you can enjoy a mini treat!


Monday, October 2, 2017

Less Expensive and Easy Gluten Free Flour

Less Expensive and Easy Gluten Free Flour

Brown Rice Flour, Potato Starch, Tapioca Starch, Xanthan Gum

I was diagnosed with a gluten intolerance 4 years ago. It was shortly after my 3rd baby was born. I was in heaven with my new bundle of joy... until I started doubling over in pain.

The stomach cramps got so intense that my husband almost had to carry me out to the car so we could go to the hospital. It took a lot of coaxing to get me to cooperate but I finally agreed to a stomach biopsy. The result? I had a section of my stomach that was being agitated by the gluten I was eating and it was causing all my pain. Crazy, I know! 

My first concern was that I didn't really know what to eat. I had watched my grandfather deal with Celiac disease for years and it was no fun. I feared I would only get eat Chex Cereal and rice cakes for the rest of my life. 

Then I started to do some research and found that a lot of people had pioneered the Gluten Free way for me. Let me just say thank you to all those people! I took a lot of idea's from other people, put my own spin on it, and got some great recipes that have made my diet change barely noticeable! 

The first thing I needed was a good gluten free flour. I tried a ton, from store brands to home made mixes. (Beware! Some store brands use bean flour and that stuff has a weird after taste.) 
After a lot of trial and error, I finally found a flour blend that is great!

Here is my recipe: 2 Cups Brown Rice Flour
                              2/3 Cup Potato Starch
                              1/3 Cup Tapioca Starch
                              1 Tablespoon Xanthan Gum


First up is the rice flour. I like to grind my own rice flour (aka my darling hubby will grind a bunch of brown rice into flour for me. Thank you, honey!) You can also buy rice flour, but I find that using a food mill to make my own is much cheaper.


Next I take the rice flour my hubby ground and mix it with the Potato Starch (also called Potato Flour), Tapioca Starch, and Xanthan Gum. Sift these together really well. You want it all blended so you can use this just like regular flour.


Finally, store it all in an air tight container to use at any future time. Here you see a big container of GF flour. I make a lot at one time so I will have some on hand for several months. Start out by trying the smaller recipe you see above. If it works out as well for you as it did for me then start making it in larger quantities. It will 'keep' just like regular flour.

I find that this flour can be substituted on a 1:1 ratio with regular flour for most recipes. I will be posting some of my favorite GF recipes in following blog posts!

Thursday, September 7, 2017

Settling In

Settling In

That part about moving everyone forgets to mention!

Finally made it home!

You have your new job, you purchased your new home, and after weeks of waiting to close, you are finally able to move in. And then what?
Getting settled into your new home and community is one of the tougher, though often overlooked, parts of moving. You have to undo all your long hours of packing and reestablish a routine with your children. Here are some things I have learned from getting settled time and again.

1. Kids stuff goes on the truck last and comes off 1st

Moving is rough on kids. It completely upsets their routine. And new places can be scary! The sooner you get your kids into their new rooms with their familiar toys and furnishings the sooner they will start to feel at home. If you feel your kids are old enough then have them unpack and organize their own room. This is also a great way to distract your little helpers if you are not quit ready for their help.

2. Find a Church

You may think this one is a bit different but I have found that a church congregation is an invaluable recourse for getting to know your new community. Not sure what doctor to go to? Ask someone at church. Looking for a good preschool? Ask someone at church. In my new congregation I have met people who have preschools, teach dance lessons, are delivery nurses with great insight into which doctor to use, and so on. Church is where you get all your questions about your new town answered.
Having trouble finding a congregation? Don't worry. The Church of Jesus Christ of Latter Day Saints loves to have visitors! Just go to www.lds.org. In the middle of the home page is a link called Meetinghouse Locator. Click on it. Enter your address into the search bar that appears on the left hand side of the page. Then a meeting house address will appear, along with the meetings time and the name of the bishop. I love that there is a map to show you how to get to the church building!

3. Story Time is Mom Time

After I get to know moms at church I always love to meet more people at community events. One of the best places to meet other moms is at the story times offered by the public library. I have met so many great moms who have children close to my kids ages this way.

4. Prioritize Unpacking 

When I unpack I go for the essentials first. My kitchen is unpacked and organized 1st thing. As for my all the pictures that usually go on the walls... Well, let's just say I am more concerned about finding a good location for the play dough than hanging my old bridal photos;)

5. Register your children for school 

If you are lucky enough to move in the summer then you have plenty of  time to get your kids all signed up for school. If you are moving during the school year then this will need to be done much sooner. Don't forget to have copies of those immunizations for the new school. I forgot to get them for this move and have had to call up the old doctors office at least 5 times now to have something faxed somewhere. Plan ahead to save yourself some time.

6. Decide which Doctor and Dentist are right for you

This always gets people really worked up but I find that if I don't like the doctor or dentist then I can just switch to a different one. That isn't to say that I just pick someone at random. I read all the doctor's bio's before our first visit. I ask all the new moms I meet which doctor or dentist they prefer. Even with all that I won't know if this particular person will work well with my family until I meet them. Be willing to try out a few people if you have the chance.

7. Set up play dates for your kids soon!

Yup. I am on of those moms that will ask you to a play date as soon as I meet you. I am all about getting a play date set up so my kids can meet other children. Again, this helps them settle into the new environment as much as me. Don't feel stressed that you have to have someone over to your house right away. Parks are great places to meet up with, or just to meet, other moms with kids. I really to find that the sooner my kids make new friends the happier they. Anything for our babies, right?

So those are some of the things that I do when I move to a new town. I have tested each one of these suggestions multiple times and find that they work great for me. What are some of the things that you do to settle in to your new home? I would love to hear what you have to say!

Monday, August 21, 2017

Kids Snack Bags

Kids Snack Bags! 

Travel food for your little ones


My kids love to have what everyone else is having for a snack. It always looks like more fun than their own snacks. So I have come up with a great idea for our family. Snack Bags!

I take the kids to the store and let them each pick a bulk snack item that they can share with their siblings. (Avoid chocolate or yogurt coating since they like to melt in heat). Then the kids get to place their snack in their siblings snack bags. It is an awesome sharing experience.

Now, I don't make just a few of these bags. I always make enough for an entire trip and then some. Sounds like a lot of work? Have your children help you out like I have mine. We have the snack assembly line down!


Ingredients for this snack bag batch are gold fish, fruit snacks, vanilla wafers, cheese-its, mini marshmallows, and strawberry wafer cookies. These bags are for our move so we made them extra fun! Make your's according to your children's tastes. We make sure everyone gets the same amount in each bag. I also got the kids new good 2 grow juice bottles. I love these bottles because they are dishwasher safe and are just the right size for water bottles.

Once done, I store all the snack bags in a sturdy box with a lid so they don't get crushed. I find a plastic shoe box works really well. Keep it in easy access so you can pass out snacks in the car. Have a great trip!


Monday, August 7, 2017

Packing With Kids!

Packing with Kids

(It's more fun than you think!)


Baby has packed up his most important things. Himself!

Packing with kids can be the most daunting task some moms undertake. But it doesn't have to be. It can be a great teaching opportunity with small children. Here are some of the things I have learned from all the times I have moved with my little children. 

1. Cut that Clutter

This is the 1st step in any move. You know that you have stuff you don't need. You know your kid has been hoarding a gift bag from some birthday party for over a month. Let's take a little time to clear some of that out. Let your kids keep their treasures but get rid of the junk. 
Do this early so the move isn't associated with getting rid of things. Help you child to consider this as a spring cleaning moment. 

2. A bit at a time 

Pack a few boxes at a time. It will be less daunting for you and your kids if the house is packed in stages rather than one massive packing spree. Seasonal stuff or things you haven't used in a while are great to start with. Keep necessities out till the end. 
I have found I can back a lot when baby is asleep so make nap time your packing time! 

Baby packed up the crepe paper for me!

3. Let the kids help 

I have my kids help me pack boxes. I teach them how to pack breakables, organize boxes, and how to use all the space. Doing this together as a family helped me to know some of their concerns. 
My 3 year old was worried that everything was going in a box and she would never see it again. I would have to tell her over and over that is was all going to our new house. Finally, the concept sunk in and she was fine to pack up everything because 'it will be at the new house with me.' 

4. Have children pack their own boxes

I gave each of my children 3 boxes. One was for the truck and one was for the things they wanted to stay with them through the whole move and the last was to play with. (Kids love boxes so let one entertain them!) The children were so excited to get to choose what went in each box. While I did have to supervise I was able to let the kids pack their own rooms! 

5. Call in the Calvary

If you have offers from friends to help you pack or watch the kids take them up on these offers! I had a kind woman from church offer to watch the kids and another offer to help me pack. Thanks to those two ladies I was able to get my whole kitchen packed in one hour!
Don't hesitate to ask if you need help. 

6. Cleaning up afterwards

Do you have to clean the house after you move out? I have always had to and paying a cleaning company is not a luxury I can afford. If you have a cleaning list from your landlord, break it up over a few days. And again, get your kids to help you. I give my kids Magic erasers and have them wipe down anything they can reach. They are such helpful children! 

I won't lie to you, moving is stressful. But guess what? You can do this! Packing doesn't have to be an overwhelming experience. At our house, we crank up Disney Radio and go to town filling boxes. My philosophy is this: As long as it gets there in one piece then it's all good!


Saturday, August 5, 2017

Control is often an Illusion

Control is Often an  Illusion

There is an interesting idea that we as adults often put a lot of stock into: Control.
Control is when your personal will is what will dictate the actions or outcomes.  In parenting, we believe that we have control over our children.  On rare occasion this is true.  Our children will listen and obey exactly as we want and this produces the desired outcomes.  More often, our children do not listen and obey exactly as we want or the outcome is not what we wanted.  One of the major reasons for this is differences in perspective.
Perspective is how things are viewed.  When we have the same perspective as our children we have a much better chance of understanding them and they understanding us.  Consider this example: When you are looking at another person and say that you'd like the object on the right, the other person can be easily confused.  Do you mean your right or their right?  This is a very simple example, but it helps bring the concept out.
Another idea of different perspectives that I get all the time with my kids is what is complete or enough.  When you ask a kid to put their toy in their room, they do exactly what you ask and will usually just throw it into their room.  After several things from around the house being put in their room, I will walk by and see that there is a pile of stuff on their floor that needs to be put away.  From my parent perspective, putting something in your room meant putting it in the correct place in their room.  They were only told to put the toy in their room.  Now I have to work at a more specific level with my kids on putting away each of the toys in their proper place in their room.  After a while kids may have the same perspective on what it means to put something in their room as parents have about it, but it will take work to get there.

The Best Life

 Have you ever heard the phrase 'Living their best life'?  When we hear 'living their best life' we think of people with ama...