Showing posts with label Frugal Living. Show all posts

Thursday, February 13, 2020

Valentine's Day Rice Crispy Snacks


Looking for the perfect yet easy thing to make for Valentine's Day for your kids? Well look tho farther than your own kitchen. Chocolate Dipped Rice Crispy Snacks are fast, easy, and cheap. You only need a few things that could already be in your cupboards. 
Rice Crispy Cereal, Chocolate Chips, Marshmallows, Butter, and Sprinkles. 


To start, make a batch of Rice Crispy's. I made a double batch to fill a well buttered 18 x 13 pan.  I used the rice crispy recipe on the back of the cereal box. (I used to think that Rice Crispy's were super hard to make and only the most amazing of mothers ever made them ;)

After the Rice Crispy's have had a chance to cool off, and aren't so sticky, you can use any cookie cutter to make your shapes.  I used a medium sized heart cutter. I don't recommend doing any shape that is very elaborate. It can get hard getting the crispy out of the cutter. If the cookie cutter gets too sticky then rub it down with some butter. Remember, when making rice crispy treats butter is your friend! 

You can stop here... Or you can make these simple treats spectacular! 


Put all your rice crispy's on wax paper. 
Place one back of chocolate chips into a microwavable bowl. My husband will only eat milk chocolate so we have no semi-sweet in this house. You can this recipe with either kind of chocolate, just watch it very carefully on the next few steps.


On medium heat, microwave the chocolate chips for 1 to 1 1/2 minutes. The chocolate is melted when it becomes shiny. 


Add 2 Tablespoons of margarine to the Chocolate and stir thoroughly. 
Once the chocolate is smooth dip part of one of the rice crispy hearts into it. I did the top half of the treat. Put it back onto the wax paper.  
Add the sprinkles to the still wet chocolate. I let my kids do this part. 
And Voila! You have some amazing Valentine Day treats that didn't take hours to make!


Chocolate Dipped Rice Crispy Hearts

6 Tbs Butter
2 Packages Marshmallows (10 oz. each) 
12 Cups Rice Crispy's
1 Package Chocolate Chips (about 11 oz.) 
2 Tbs Butter 

Grease 18 x 13 cookie sheet well. 
Put 12 cups (about 1 box) Rice Crispy's into large bowl. 
Melt 6 Tbs butter in large sauce pan over medium heat. Add marshmallows to melted butter and mix until marshmallows are melted. Pour over rice crispy's. Mix until well coated. 
Put marshmallow/ rice crispy mix into greased pat using a buttered spatula. Press down evenly. 
After rice crispy's have cooled cut out with cookie cutters. Place cut crispy's on wax paper. 
Empty bag of chocolate chips into microwave safe bowl. Melt on medium heat for 1 to 1 1/2 minutes in microwave. 
Add remaining 2 Tbs butter to chocolate. Stir until smooth. 
Dip rice crispy's into warm chocolate. Lay flat on wax paper, chocolate side up. 
Decorate with sprinkles. 

Enjoy!


Monday, November 19, 2018

Gluten Free Pie Crust Hack

Gluten Free Pie Crust Hack


It's that time of year when we are making pies for our loving families. But what do we do for our family members who can't eat gluten? 

You could spend a fortune buying gluten free pie dough or pre-made pie shells. Or you could try my easy and cheap gluten free pie crust hack. 

I bet you already have the ingredients you need.

Cheerio's! 


Say What? 

Yep. Cheerio's are made gluten free. All you have to do is use them in place of Graham cracker crumbs for any of your pie recipes. And you can use any kind of Cheerio's you have on hand. It's that easy. It's that cheap. It's that amazingly awesome!

In case you don't have a graham cracker crumb recipe here is mine with instructions of how to prep your Cheerios for your pie crust. 

All you need is: 
1 1/2 cup Cheerio crumbs 
1/4 cup melted butter (1/2 a stick) 
2 Tablespoons white sugar 


Put the Cheerio's into your food processor or blender. Blend until a fine crumb is formed, about 30 seconds.


Measure out 1 1/2 cups Cheerio crumbs and put into your desired pan.


Mix in the melted butter until all the crumbs are coated. 

Mine isn't pressed into the sides of the pan perfectly but you get the idea!

Press along the edges of the pan. 

Bake for 8 minutes at 350 degrees. 

And that is it! You now have a gluten free pie crust that didn't break the bank! 

Enjoy!


Monday, October 22, 2018

No More Naked Barbies!

Do you ever get tiered of finding your daughters Barbie dolls laying around... in the nude? I sure do and it is a huge pet peeve of my hubby. So I decided to do something about it.
I took some finger nail polish and painted swimsuits on all the Barbies in my house. And you know what? My girls thought they were darling!
So after some new dolls arrived in the house I allowed my girls to paint the swimsuits on the dolls... with a lot of supervision of course.
Here is what it was like at our house yesterday afternoon!


Here is their finished Barbie! I had to help BJ a lot. Poor Aroura ended up with paint up to her chin. Thankfully we had nail polish remover on hand. Don't let you kids do this without you there to help!
The girls had a blast and I love that they are willing to keep their toys modest!


Saturday, February 3, 2018

Replacing A Coat Zipper

Replacing A Coat Zipper


Do you have kids? They go through clothes like crazy. Okay let's be totally honest here, kids go through everything like crazy! But clothing kids, especially if you have a large family, can get very expensive.
I am a firm believer that if you want to have a large family, even on one income like my hubby and I do so I can stay home with the kids, then Heavenly Father will provide a way. That way comes in lots of forms. Everything from babysitting other children, to coupons, to being really thrifty by buying a coat when its on sale at the end of the previous winter season. Yup, that's how I got my son his awesome new coat for the currant school year.
Another way we have been able to live frugally is to mend things before we resort to buying something new. In order to keep up with all the wear and tear kids put on their clothes I had to learn to sew. My mom taught me the basics when I was in high school and I filled in the rest with lots of practice. It has come in handy! Because I can do some basic sewing I am able to save money by repairing my families clothing items instead of replacing them all the time.
When the zipper on my sons coat broke after just a few weeks of wear I was pretty annoyed. But I didn't just throw out the coat. I spent $3 on a new zipper and now his coat is as good as new!


1. The first thing you have to do is find out what size of zipper you need. Measure your existing coat zipper for the size. Zippers sold in the stores are measured from the bottom of the zipper to the extra fabric at the top. It's usually 1 inch of extra space that you don't really need. Get a zipper that's as close to the zipper you need as possible.
If you are having trouble getting a new zipper that is just the right size get one that is a tiny bit on the small side. It is better to deal with a new zipper that is 1 inch too small than to have one that is 1 inch too big. Trust me!

2. Next, get the old zipper out of there! This requires a seam ripper and some patience. It takes a while to get old zippers out since most coats have them sewn in really well. Do your best and take your time. As you remove the old zipper keep track of all the places the coat was attached to it. Then you will be able to attach the new zipper in the same places. 

3. Pin the new zipper in. Make sure you have kept careful track of where the old zipper was attached so you can put the new one in the exact same place. If you look at my picture you will see that part of my zipper is pinned the 'wrong' direction. This is so I can sew it to the interior of the front of the coat before I attach it to the inside lining of the coat.
If your new zipper is a bit too small, that's ok. You can either tuck the extra inch in and put the zipper all the way at the top of the coat. This gives you an inch of loose fabric at the bottom. Or you can use the whole zipper and have an extra inch at the top. 

4.  Now the fun part. Sewing the zipper in! If you have a zipper foot for your sewing machine then thank your angels up above. If not, it's ok. I don't have one and am still able to do lots of sewing projects.
On the side that has the zipper tab sew half of the new zipper in. Keeping the needle embedded in the zipper, lift the foot so you can move the zipper tab past the needle. Put the foot back down and continue on your way. You may need to back stitch a few stitches to make sure everything is still lined up.

And there you are! You have just replaced a zipper in a coat. Great job! 


Here is a photo of what my sons coat looked like when I was finished. I actually like this zipper way more that the cheap plastic one that used to be there. The new metal one will last much longer. Maybe even through the next boy who wears this coat;)

Rice Pudding

Rice Pudding

German Style 

Rice Pudding with raisins and cinnamon


I served a mission for the Church of Jesus Christ of Latter-day Saints in Germany and Austria. While there I fell in love with German cuisine. I learned from wonderful German women how to make food that was like a piece of heaven on a plate.
Here is one of the first German recipes I learned to make. It's sweet, creaminess is certain to bring a smile to the faces of your family.

Rice Pudding:
2 Cups Milk
1 tsp. Butter
1/2 Cup White Rice
1/2 Cup White Sugar
1/2 Cup Heavy Cream, whipped
1/4 tsp. Cinnamon

In a medium saucepan bring the milk and butter to a boil. Stir well. Add the rice and simmer over low heat for 25 minutes, stirring occasionally. Once rice is tender remove pan from heat. Mix in the sugar. Whip the cream and add it to the rice. Stir well. Dish into bowls. Sprinkle with cinnamon.

I enjoy this pudding warm and with some raisins in it. My hubby likes it best after it has been chilled in the fridge. And my kids love it for breakfast! Either way, it is a delightful addition to any day.

Friday, January 12, 2018

Frugal Food

Frugal Food

Lentils and Rice Casserole
It may look simple but this is one tasty meal.

The new year is always the time for new goals. Two of the most common goals deal with money and food. Everyone wants to eat better while spending less money at the same time. And guess what? You can!
Here is one of my most frugal meal recipes. This recipe checks a ton of boxes for different  diets such as gluten free and vegetarian. It's cheap, easy, and tastes really good!

Lentils and Rice Casserole:

3 Cups Water
3/4 Cup Uncooked Lentils, rinsed
1/2 Cup Uncooked Brown Rice, rinsed
3/4 Cup Chopped Onion
1 Cup Frozen Mixed Vegetables
1 tsp. Salt
1 tsp. Basil
1 tsp. Garlic Powder
1/4 tsp. Oregano
1 Cup Shredded Cheddar Cheese

Place all ingredients, except cheese, into a 9x13 inch baking dish. Mix well. Cover with tinfoil. Bake at 300 degrees for 2-2 1/2 hours, until tender and water is absorbed. Remove tinfoil. Top with cheese. Bake uncovered until cheese is melted.

And that's it! It takes me 5 minutes to throw this meal together and it can bake while I drive kids to all their activities. Easy, healthy, and frugal.

Friday, October 27, 2017

Homemade Pumpkin Puree

Homemade Pumpkin Puree

It's that time of the year!


I know that you can buy canned pumpkin pack in the store, but have you ever wondered what a pumpkin pie would have tasted like in the days of Laura Ingalls Wilder? Well, I sure have. And since pumpkin pie is my favorite pie ever I had to try it from scratch. Let me tell you, real pumpkin puree it is like a bite of creamy heaven.

There was one year I had a neighbor with a large garden who had grown pumpkins. A lot of pumpkins! Thankfully, she was willing to share them with the whole neighborhood.

I ended up with about eight pumpkins in my garage and no idea what to do with them. But you know me, I had to do something with all these pumpkins. Waist is not an option with me. After a few jack-o-lanterns I found out how to make pumpkin puree. It has been one of the best, the yummiest, things I have ever done.

Before I tell you how to make your own pumpkin puree there is a warning... Once you use pure pumpkin puree in a pie or other recipe you will never, EVER, want to go back to the stuff from the can. It is that good!


1st. Start with a pumpkin. Most stores sell the little pie pumpkins next to the big jack-o-lantern ones. While the little pumpkins are grown to be made into puree I have used both kinds and have ended up with great puree from both kinds. The smaller ones will usually give you a darker colored puree, if you were wondering;)


2nd. Let's gut that bad boy! Cut your pumpkin in half so you can easily get to all the gooey stuff in the middle. Discard the stringy stuff but keep the seeds for roasting. You don't have to get too picky about how 'clean' the inside of your pumpkin is.


3rd. Once your pumpkin is cleaned out, slice it into smaller sections and arrange on a baking sheet. Face up is best.


4th. Put them into the oven at 350 degrees for 45 minutes, or until they are tender. Poke them with a fork to see if they are done. The pointy edges should be just about to get crispy.

5th. Let the pumpkin slices cool enough that you can handle them. Then turn them over so you can pull the skins off. Yes, the skins should pull right off. If not, then pop them back in the oven for 5 more minutes. (There was a lot happening in the kitchen right about here so I stopped taking pictures. Sorry)

6th. With the skins removed it is time to puree! I use a blender but there are lots of ways to turn a pumpkin to mush. If you decide to use a blender like I do, place several chunks into the blender and push puree. You will need to add some water to get things moving. Add water a single Tablespoon at a time, just until things get moving. You want puree, not soup! (Before you ask, yes I did make that mistake one year.)

And that is it! Once you are done blending you have some awesome, homemade puree that you can use right away.

If you have more than you need, store in in freezer storage bags for future use. I put 2 cups of puree in each  bag and throw them in the freezer! OK, not throw. I carefully make sure each bag can lay perfectly flat so they take up less room. What can I say, I am a neat freak;)

You can store it in a freezer for 6 to 8 months this way... OK, more like over a year. I made a huge batch of pumpkin puree once and only just finished it 3 years later! Wow, so glad I was honest with you all.

Coming soon... Homemade Pumpkin Pie!

Wednesday, October 11, 2017

Gluten Free Blueberry Muffins

Gluten Free Blueberry Muffins


It's always a  struggle to get really good gluten free baked goods. But fear not! I have an amazing gluten free blueberry muffin recipe for you.

Here is what you need:

2 Cups Flour (Check out my Gluten Free flour mix!)
1 Cup White Sugar
1/2 teaspoon Baking Powder
1/2 teaspoon Baking Soda
1/2 teaspoon Salt
1 1/2 Cups fresh or frozen Blueberries (if using frozen berries do NOT thaw)
2 Eggs, lightly beaten
1 Cup Sour Cream
1/2 Cup Vegetable Oil
1/2 teaspoon Vanilla Extract

AND a Mini muffin pan. I have tried these muffins in a regular sized pan and they just don't come out as well so we always go for mini muffins. Plus, my kids love the smaller size!

Preheat your oven to 400 degrees Fahrenheit. In a large bowl combine the flour, sugar, baking powder, baking soda, and salt. Add the blueberries and gently toss. (This will keep them from sinking as the muffins bake.) In a separate bowl, combine the eggs, sour cream, oil, and vanilla. Mix well. Stir the wet mixture into the dry ingredients until moistened. Don't over mix. Grease your mini muffin cups. Fill them to 2/3rd's full. (I use my cookie scoop to get them all the same size.) Bake for 15 to 18 minutes, or until a toothpick comes out clean. Allow to cool for 5 minutes before removing from the pan.

Well, there you have it. Straight to the point Gluten Free Blueberry Muffins. You can use other berries if you want but these are my daughters favorite. They also keep in the freezer for 2 months. Just bake, freeze, then warm them up so you can enjoy a mini treat!


Monday, October 2, 2017

Less Expensive and Easy Gluten Free Flour

Less Expensive and Easy Gluten Free Flour

Brown Rice Flour, Potato Starch, Tapioca Starch, Xanthan Gum

I was diagnosed with a gluten intolerance 4 years ago. It was shortly after my 3rd baby was born. I was in heaven with my new bundle of joy... until I started doubling over in pain.

The stomach cramps got so intense that my husband almost had to carry me out to the car so we could go to the hospital. It took a lot of coaxing to get me to cooperate but I finally agreed to a stomach biopsy. The result? I had a section of my stomach that was being agitated by the gluten I was eating and it was causing all my pain. Crazy, I know! 

My first concern was that I didn't really know what to eat. I had watched my grandfather deal with Celiac disease for years and it was no fun. I feared I would only get eat Chex Cereal and rice cakes for the rest of my life. 

Then I started to do some research and found that a lot of people had pioneered the Gluten Free way for me. Let me just say thank you to all those people! I took a lot of idea's from other people, put my own spin on it, and got some great recipes that have made my diet change barely noticeable! 

The first thing I needed was a good gluten free flour. I tried a ton, from store brands to home made mixes. (Beware! Some store brands use bean flour and that stuff has a weird after taste.) 
After a lot of trial and error, I finally found a flour blend that is great!

Here is my recipe: 2 Cups Brown Rice Flour
                              2/3 Cup Potato Starch
                              1/3 Cup Tapioca Starch
                              1 Tablespoon Xanthan Gum


First up is the rice flour. I like to grind my own rice flour (aka my darling hubby will grind a bunch of brown rice into flour for me. Thank you, honey!) You can also buy rice flour, but I find that using a food mill to make my own is much cheaper.


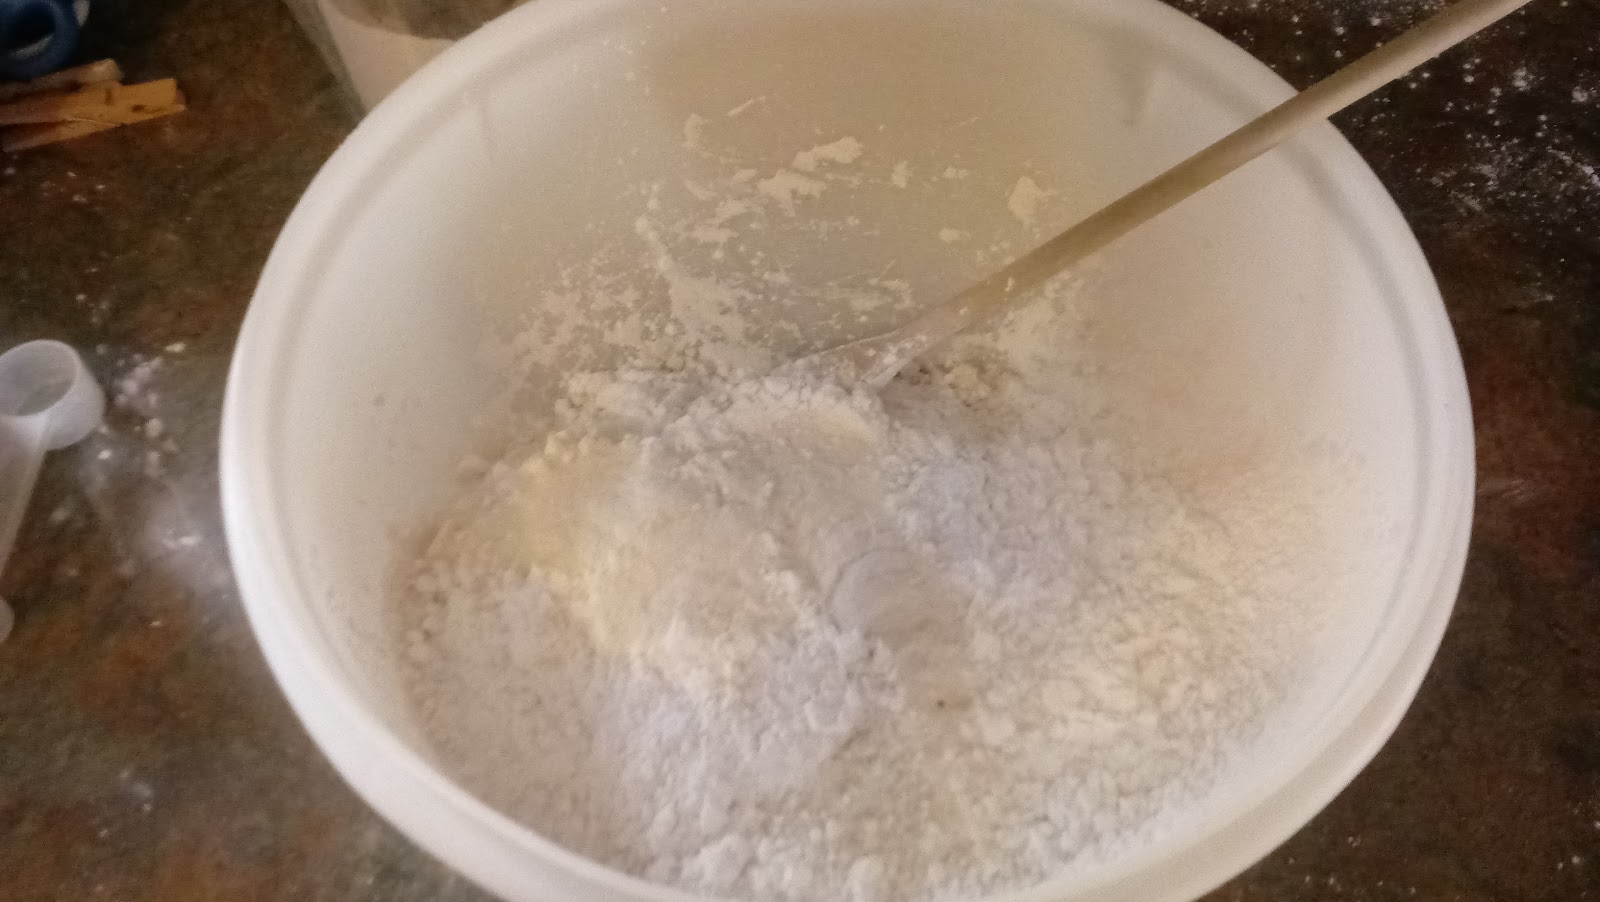
Next I take the rice flour my hubby ground and mix it with the Potato Starch (also called Potato Flour), Tapioca Starch, and Xanthan Gum. Sift these together really well. You want it all blended so you can use this just like regular flour.


Finally, store it all in an air tight container to use at any future time. Here you see a big container of GF flour. I make a lot at one time so I will have some on hand for several months. Start out by trying the smaller recipe you see above. If it works out as well for you as it did for me then start making it in larger quantities. It will 'keep' just like regular flour.

I find that this flour can be substituted on a 1:1 ratio with regular flour for most recipes. I will be posting some of my favorite GF recipes in following blog posts!

Monday, August 21, 2017

Kids Snack Bags

Kids Snack Bags! 

Travel food for your little ones


My kids love to have what everyone else is having for a snack. It always looks like more fun than their own snacks. So I have come up with a great idea for our family. Snack Bags!

I take the kids to the store and let them each pick a bulk snack item that they can share with their siblings. (Avoid chocolate or yogurt coating since they like to melt in heat). Then the kids get to place their snack in their siblings snack bags. It is an awesome sharing experience.

Now, I don't make just a few of these bags. I always make enough for an entire trip and then some. Sounds like a lot of work? Have your children help you out like I have mine. We have the snack assembly line down!


Ingredients for this snack bag batch are gold fish, fruit snacks, vanilla wafers, cheese-its, mini marshmallows, and strawberry wafer cookies. These bags are for our move so we made them extra fun! Make your's according to your children's tastes. We make sure everyone gets the same amount in each bag. I also got the kids new good 2 grow juice bottles. I love these bottles because they are dishwasher safe and are just the right size for water bottles.

Once done, I store all the snack bags in a sturdy box with a lid so they don't get crushed. I find a plastic shoe box works really well. Keep it in easy access so you can pass out snacks in the car. Have a great trip!


Monday, August 7, 2017

Packing With Kids!

Packing with Kids

(It's more fun than you think!)


Baby has packed up his most important things. Himself!

Packing with kids can be the most daunting task some moms undertake. But it doesn't have to be. It can be a great teaching opportunity with small children. Here are some of the things I have learned from all the times I have moved with my little children. 

1. Cut that Clutter

This is the 1st step in any move. You know that you have stuff you don't need. You know your kid has been hoarding a gift bag from some birthday party for over a month. Let's take a little time to clear some of that out. Let your kids keep their treasures but get rid of the junk. 
Do this early so the move isn't associated with getting rid of things. Help you child to consider this as a spring cleaning moment. 

2. A bit at a time 

Pack a few boxes at a time. It will be less daunting for you and your kids if the house is packed in stages rather than one massive packing spree. Seasonal stuff or things you haven't used in a while are great to start with. Keep necessities out till the end. 
I have found I can back a lot when baby is asleep so make nap time your packing time! 

Baby packed up the crepe paper for me!

3. Let the kids help 

I have my kids help me pack boxes. I teach them how to pack breakables, organize boxes, and how to use all the space. Doing this together as a family helped me to know some of their concerns. 
My 3 year old was worried that everything was going in a box and she would never see it again. I would have to tell her over and over that is was all going to our new house. Finally, the concept sunk in and she was fine to pack up everything because 'it will be at the new house with me.' 

4. Have children pack their own boxes

I gave each of my children 3 boxes. One was for the truck and one was for the things they wanted to stay with them through the whole move and the last was to play with. (Kids love boxes so let one entertain them!) The children were so excited to get to choose what went in each box. While I did have to supervise I was able to let the kids pack their own rooms! 

5. Call in the Calvary

If you have offers from friends to help you pack or watch the kids take them up on these offers! I had a kind woman from church offer to watch the kids and another offer to help me pack. Thanks to those two ladies I was able to get my whole kitchen packed in one hour!
Don't hesitate to ask if you need help. 

6. Cleaning up afterwards

Do you have to clean the house after you move out? I have always had to and paying a cleaning company is not a luxury I can afford. If you have a cleaning list from your landlord, break it up over a few days. And again, get your kids to help you. I give my kids Magic erasers and have them wipe down anything they can reach. They are such helpful children! 

I won't lie to you, moving is stressful. But guess what? You can do this! Packing doesn't have to be an overwhelming experience. At our house, we crank up Disney Radio and go to town filling boxes. My philosophy is this: As long as it gets there in one piece then it's all good!


Thursday, July 20, 2017

House Hunting with Kids

House Hunting with Kids
Part 2 of Moving with Kids


Every American has a dream of home ownership. It is something we have grown up dreaming about. We plan for it, save for it, pray for it. Then comes that wonderful day that we have always looked forward to, when we can walk into the home of our dreams and say "I'll take it!"
There is a lot that goes on before and after you get to that grand moment when you know a home is right for you and your family. I am currently going through it. There is a house that is perfect and then all the things I have to do to actually buy it.
Here are some of the things that I have found out while going through this process.

1. Make a reasonable wish-list

Despite what all the house hunter show's want you to think, not every home on the market has granite counter tops and hard wood floors. And can you afford them anyway? Sad to say it, but some of the things on most people's wish lists are out of their budget.
My wish-list for my future home was for a 4 bedroom, at least 2 baths, open floor plan, 2 car garage with two garage doors, large yard, quiet and safe neighbor hood, and only a few years old. While not totally unrealistic, a new build was not in our budget. I was willing to adjust and got everything that my family really needed in a new home. It is a great place!

2. What is your budget

What ever your budget is it is important to stick with it. Going over means a larger monthly payment, which may mean more time at the office, therefore less time in you new house. Don't you love how it always goes in a circle like that? Pick a home that you find comfortable and affordable so you can actually enjoy time in it.

3. What do your kids want in a house

As you go looking for a house, especially if you have older kids, find out what matters to them. For my children there were 3 things that they had to have in a new house.
         A. 2 bathrooms - both of their Grandparents have 2 bathrooms and that means a house is fancy.
         B. Stairs - a house is very fancy if it had stairs.
         C. A big back yard - meaning a yard that is big enough for them and a puppy.
Their wish list isn't extensive or unreasonable so I did all I could to make them come true. What are your children's dreams?

4. Pick the right agent

The agent you choose can make or break your house buying experience. They are your link between you and the seller. They help with all the paper work that is needed to buy a house. (And there is more paper work than you think!)
We met several real estate agents as we looked at houses. One was showing us houses with all the high end finishes at the top of our price range. While these houses were nice, none of them were large enough for you family. One was even smaller than our current apartment! This agent didn't listen to our needs so we went with someone who did. Choose some one who listens to what you want.

5. It will be a long day 

Unlike all the great house hunting shows you will look at more than 3 houses and it will take a while. Plan for it with plenty of snacks, potty breaks, and even a few episodes of your child's favorite show. They will need a little down time during the day.
If you happen to visit a house with lots of breakables, a grandma house as my husband calls it, it may be better to take turns going inside. We visited a house like that. While our oldest daughter was fine to go inside, the younger ones would have been much less fine. Taking turns worked out fine for us and then we talked about how we liked the house later.

6. Don't feel pressured

On my recent house hunting experience I felt so stressed about getting a home that day. We had traveled 10 hours to get to this new town just to find a home and we only had the one day to do it in.
We had all of our kids with us. At each house they asked if this was the house we were buying. No matter how many times I said we were just looking they would still decide which bedroom they wanted.
Needless to say that my husband and I felt a lot of pressure to get a house right then. We did choose one but as the process of buying it began we didn't feel good about it. Thankfully we got out of it and are now buying the perfect house for our family, but please learn from my mistake and don't be pressured!

6. Make it a matter of prayer

I feel God want's to be involved in all matters of our lives, great and small. Buying a house is a pretty big deal! Make it a matter of family prayer. Guidance and peace will come when you do. It certainly did for my family.

I truly hope that you enjoy looking for a house with your kids. It was such a bonding experience for us. I really came to understand what they needed to feel secure in their future home. They were even willing to share some of their dreams they had for our new town. (My daughter is hoping to make a best friend who only lives a few houses away so they can play together every day. Precious!) Best of luck as you go looking for your new home!

Sunday, July 9, 2017

Moving With Kids

MOVING... With Kids!

I have moved more in my life than most army families I know. In the 33 years I have been on this earth I've never lived in any house longer than 4 years or any town longer than 5 years. Those are not the average numbers for me either. On average, I move every 3 years or less.
With numbers like this it may seem that all this moving must be something that I love to do. Truth is, I really get tiered of moving. Each move has been in pursuit of something, either by me or a family member. Growing up it was always a move for the better job or better house. Once I moved out it was a move for the better experiences. Then I got married and had kids. It was back to moving for the better job.
All packed and ready to move!

Some, if not all, these moves have been necessary and often inspired. I know that. But it doesn't really make the whole moving experience any more fun.
But something positive has come out of all this moving. I am a moving pro! Throw in my air force raised hubby and we are an incredible on-the-go team!
In this series of posts, I wanted to share what I have learned about moving with you. Especially if you have kids. Moving can be so tough on kids. Having moved a lot as a kid myself, and moving my own kids, I know it can be tough!

1. Make a plan
You need to have a plan yourself before you tell your kids anything about moving. Getting them involved before any plans are final could really stress a child out. Make sure you know if you are truly moving. Then, know where are you moving to. These are things that you have to have settled before you bring the news to your child.

2. Tell you kids
Once you know you are moving, and you know where, share the news with you kids. This is not something that you should spring on them. They will need time to adjust to the news so tell them before the big event happens.

3. Listen to your kids
On a previous move, my oldest was turning 5. She had just finished preschool and missed her friends terribly. She needed me to listen to her while she cried about missing those friends. While it is always hard to see your baby cry, she needed to work through all those emotions so she could feel better. Make sure you take the time to listen to your child's concerns about moving.

4. Get excited about your move
Whether you are moving across town or across the country, moving will bring out a lot of emotions. Try to focus on the positive ones. This can be hard to do, but the more excited you are about the move the more excited your kids will be also.  Are you moving to a new house? What are some of the great things about this new house? Are you moving to a new town? Research your new town with your children so you can find out what fun things it has to offer. Look forward to these new things together.
Our current move is helping my family move closer to Grandparents. Daddy is getting his dream job. We also are able to buy our own house! We find that being positive about this move very easy.

Remember, moving is an adventure! Have fun with it!

The Best Life

 Have you ever heard the phrase 'Living their best life'?  When we hear 'living their best life' we think of people with ama...